Glyphplace tutorial
Every feature, step by step. Glyphplace does three things: it replaces text, replaces images, and adds new text or images through placeholders. Everything else on the page stays as it was.
Watch the video
Before you start
You need an account to use the Studio, the template designer in your browser. To follow along with the same files as the video, download:
- tutorial-invoice.pdf, the sample invoice (invoice-2.pdf and invoice-3.pdf have other values and a shifted layout)
- new-logo.png and approved-stamp.png, the images
- customers.csv, the data for batch fill


A template describes one layout: where each field is and how to recognise the document. Each field has a key, such as customer. You design a template once on a sample document, then use it on any document with the same layout.
Without a plan, previews and downloads carry a small evaluation mark. Start the free trial to remove it from downloads.
1. Open a document
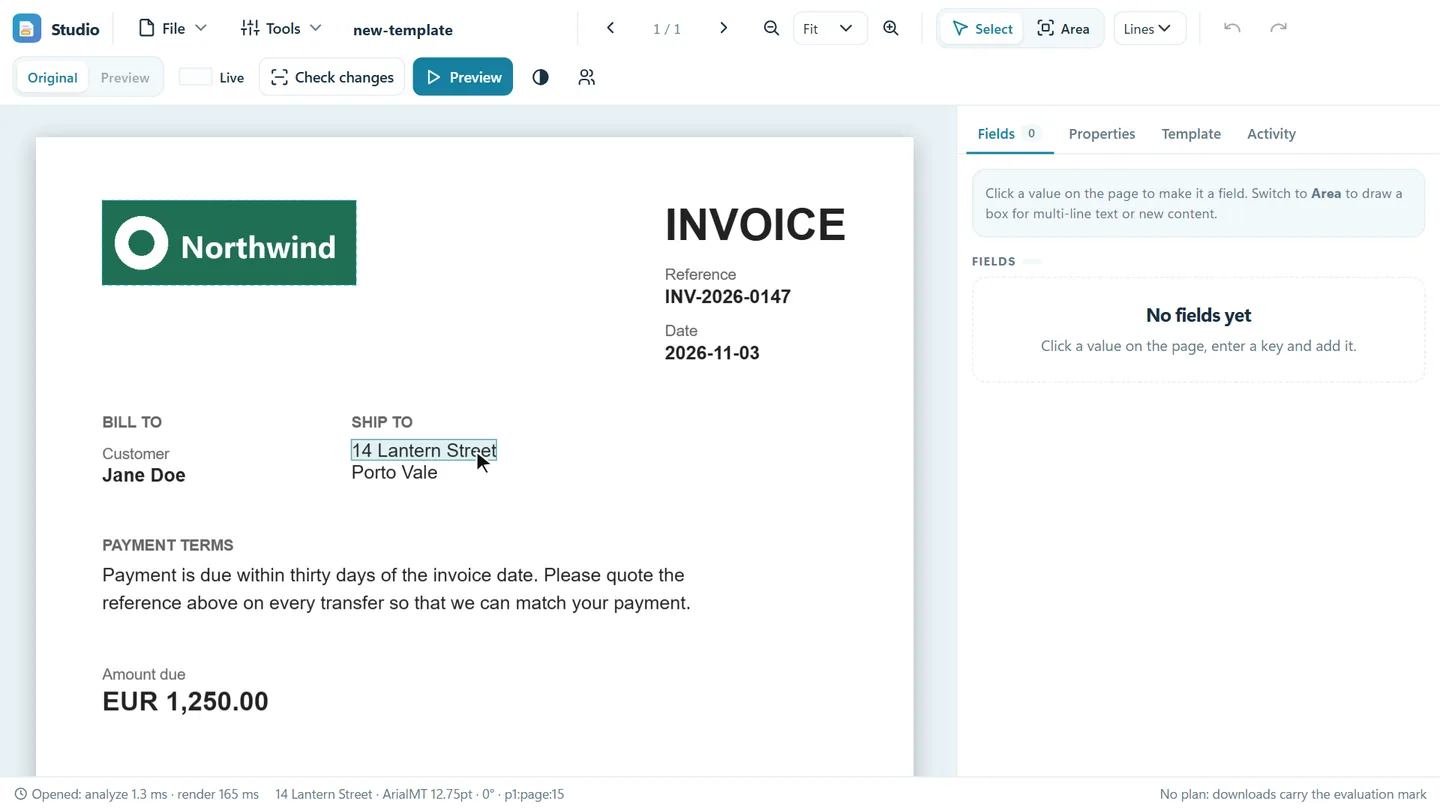
Open the Studio and drop a PDF on the page, or use File → Open PDF (Ctrl O). The document stays in memory for 30 minutes and is never stored. Text and images get an outline when you move over them. The top bar has page navigation and zoom.
2. Replace text
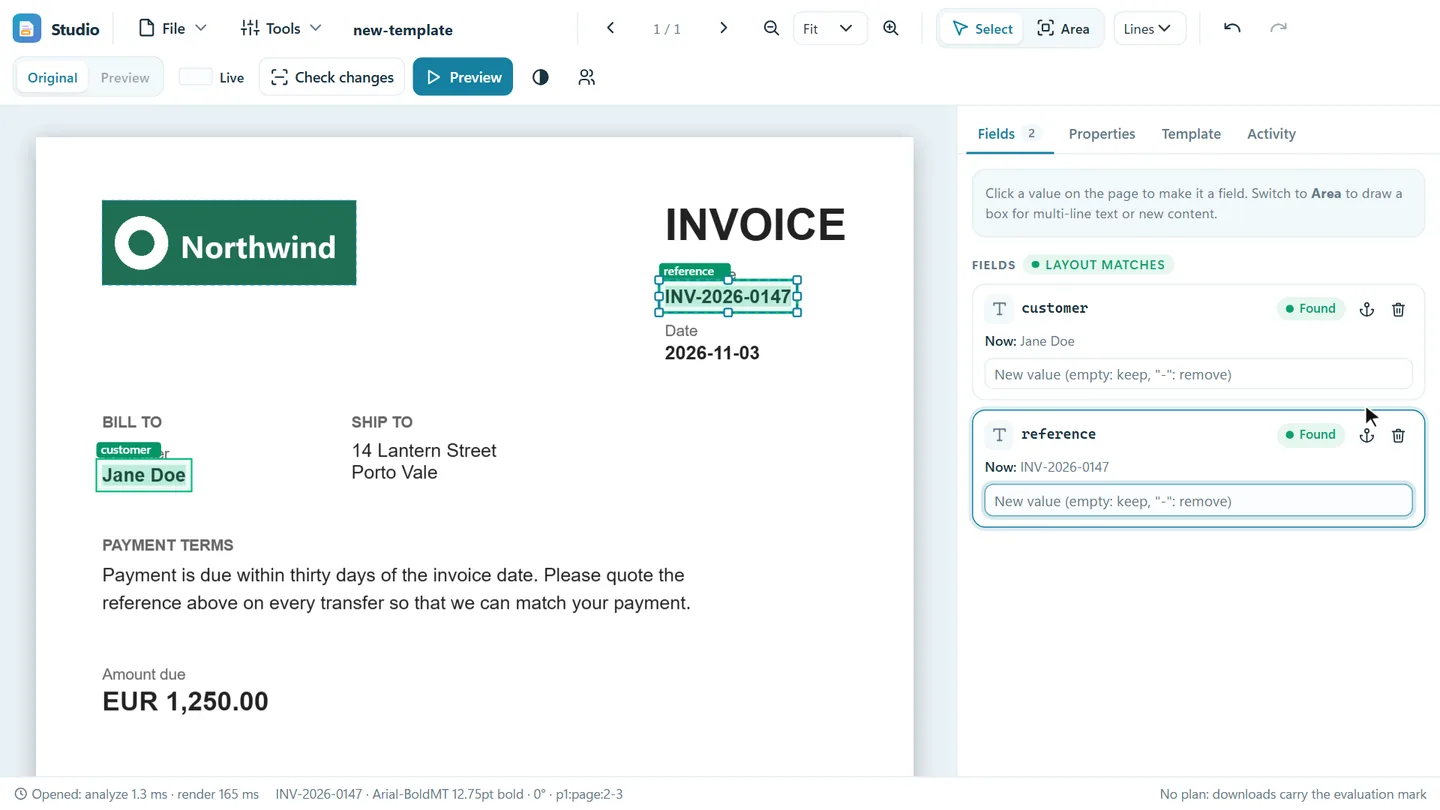
- Make sure Select mode is on (V) and click a value on the page.
- Type a key under Fields, for example
customer, and press Add field or Enter. - Type the new value in the box under the field.
The menu next to Area sets what a click selects: Lines (the default), or Runs when one line holds several separate values. In the value box, leave it empty to keep the text, or type - to remove it.
3. Anchors: survive layout changes
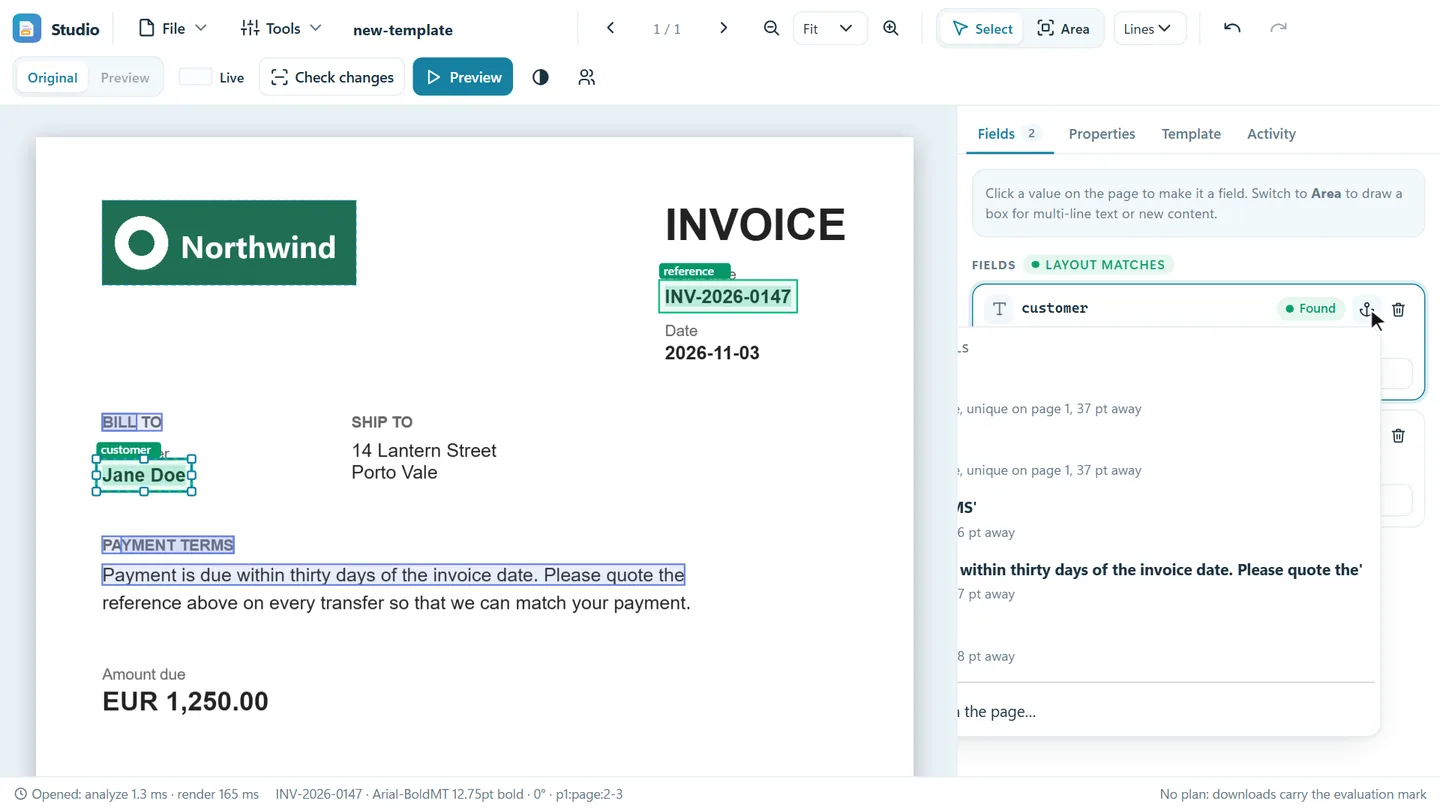
Without an anchor a field is looked for at the same place on the page. An anchor is a label near the value, so the field is still found when the content moves. Press the anchor icon of a field and choose a suggestion, or choose to pick any label on the page.
4. Multi-line text: area fields
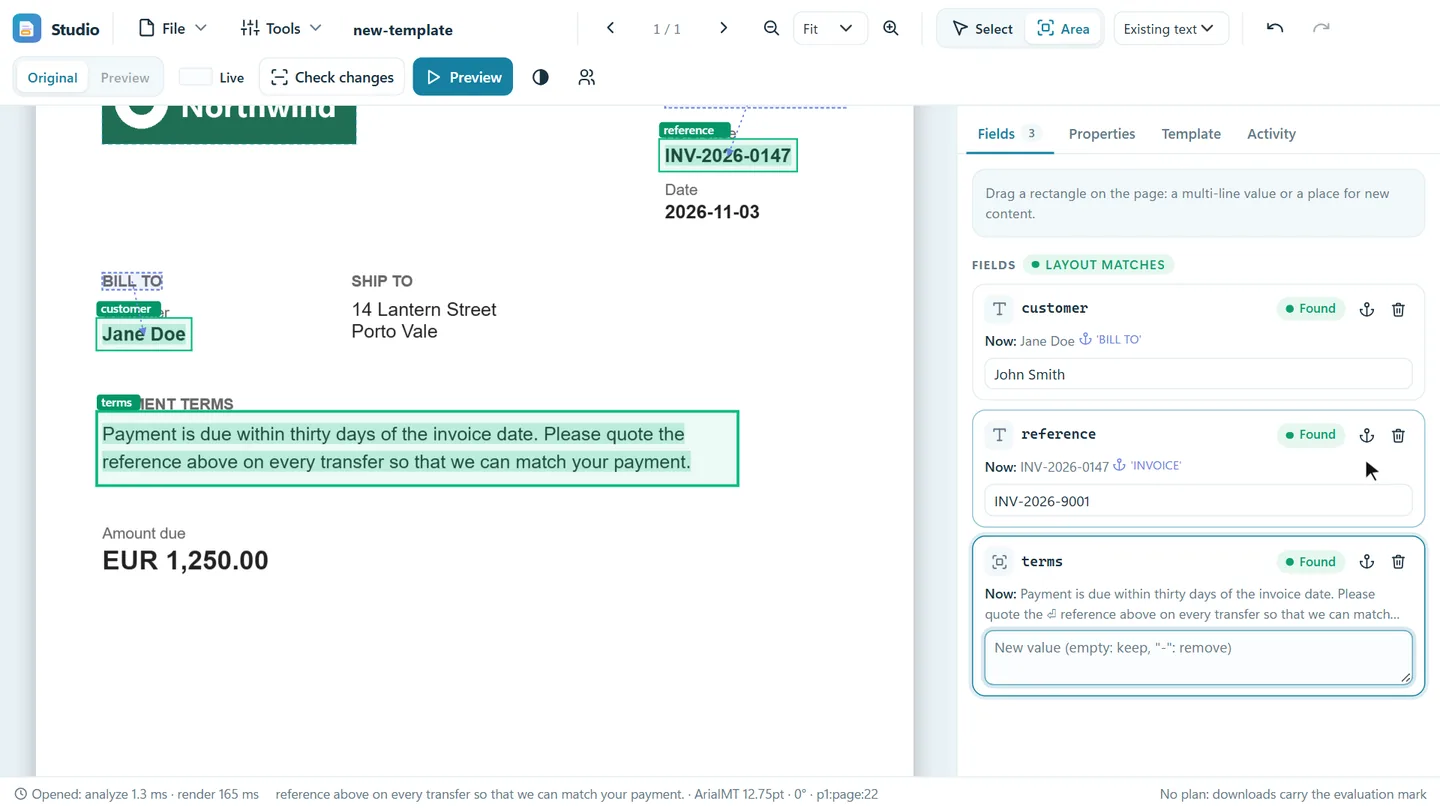
For text of several lines, switch to Area (A), drag a box around it, choose Existing text and add the field. The new value is word-wrapped into the box with the original first line, indent and line spacing. Type a line break where you want one. The font shrinks if the text would not fit otherwise; set a Minimum font size under Properties to limit that.
Give areas an anchor as well. If the text in an area has moved compared with your sample, or its first line looks different, Glyphplace refuses to replace that field and leaves it unchanged, because the area may hold other text.
5. Replace or remove images
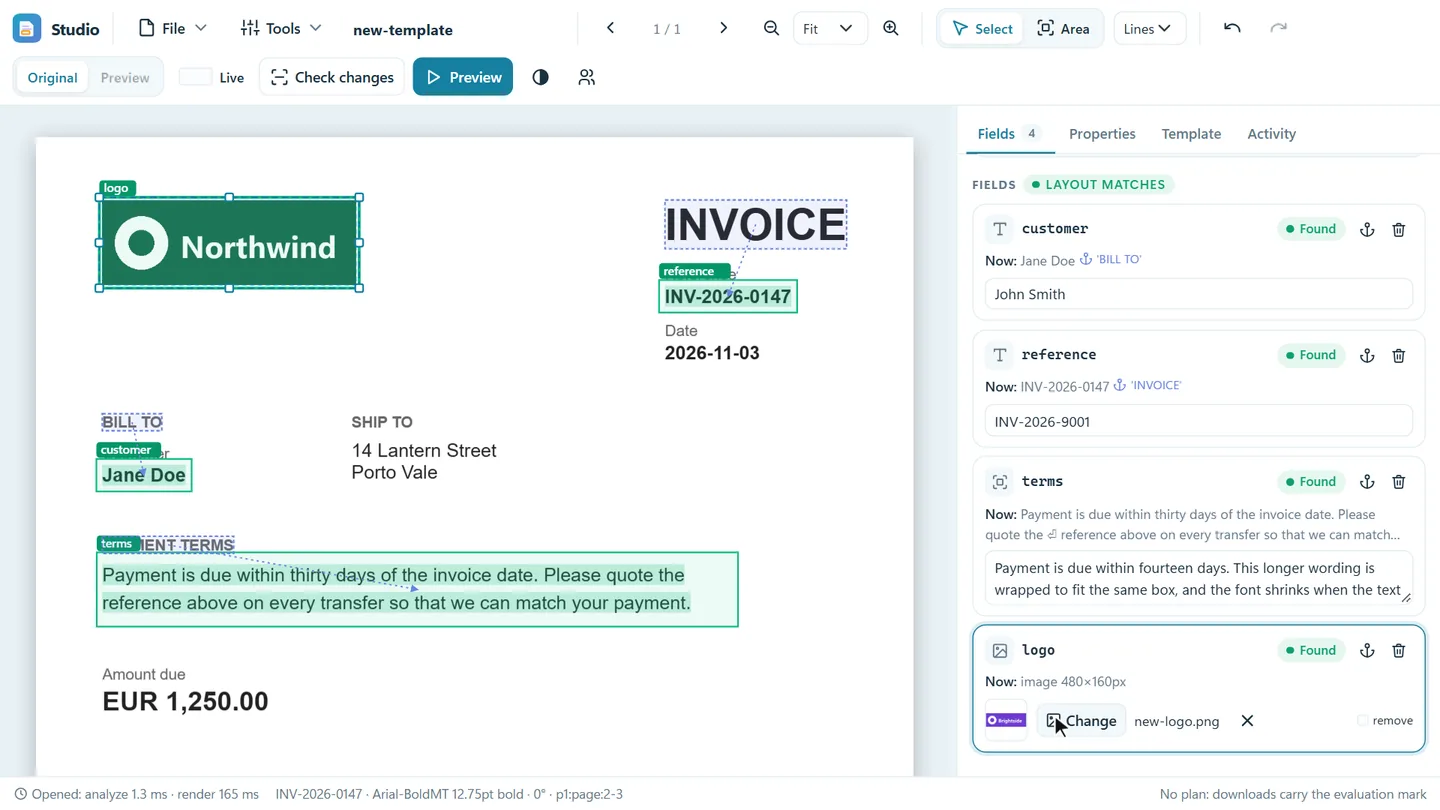
In Select mode click an image, name the field and press Add field. Press Choose image and pick a PNG, JPEG or BMP. The new image is drawn in the original box, with the original rotation. Tick remove to delete the image instead.
Under Properties → Image, Fit sets how it fills the box: Contain keeps the proportions, Stretch fills the box.
6. Add new content: placeholders
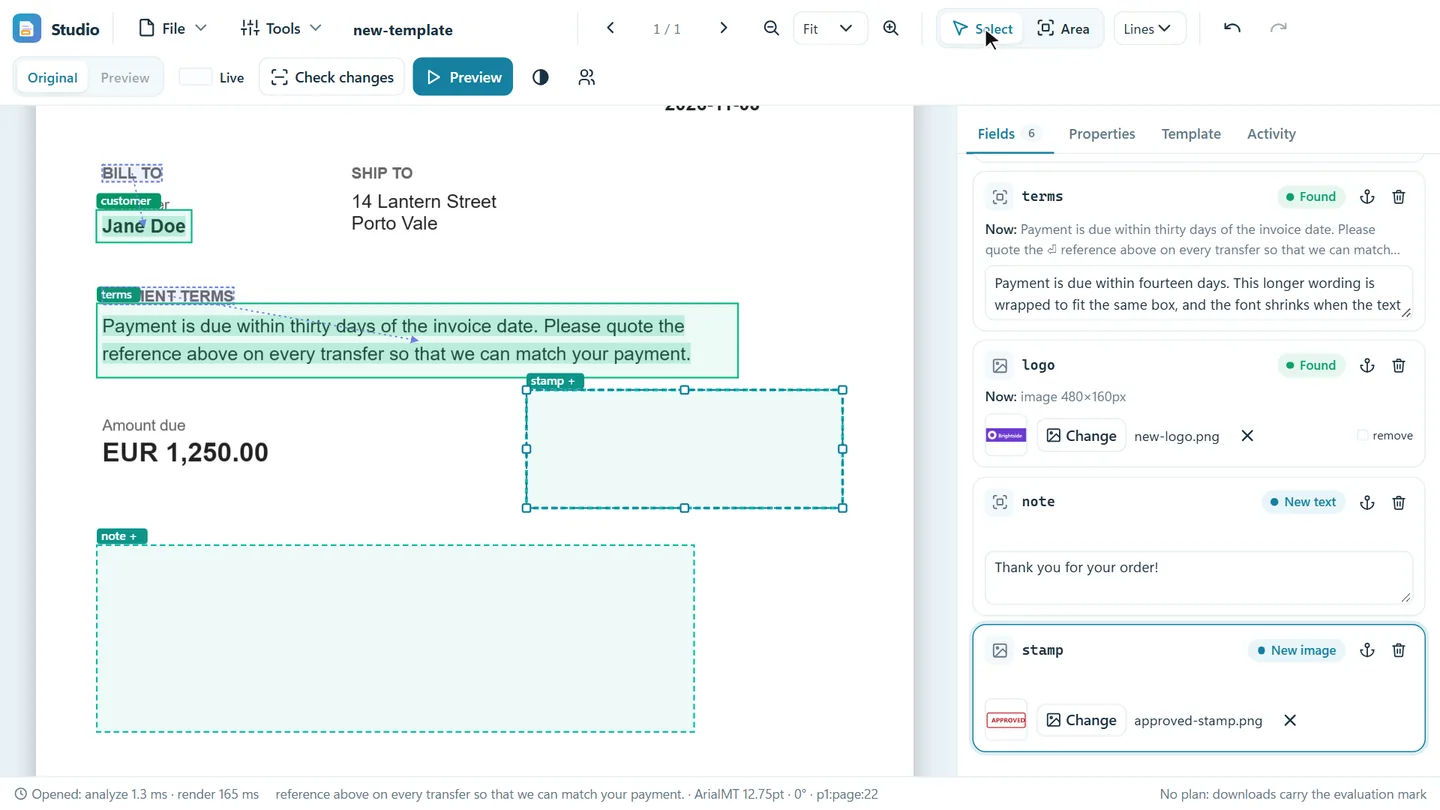
A placeholder adds text or an image where the document has none. Nothing on the page is removed.
- Switch to Area and draw a box where the content should go.
- Choose New text or New image, enter a key and press Add field.
- Type the text, or choose the image.
New content follows the page's main text direction. Anchors work for placeholders too.
7. Preview and check the result
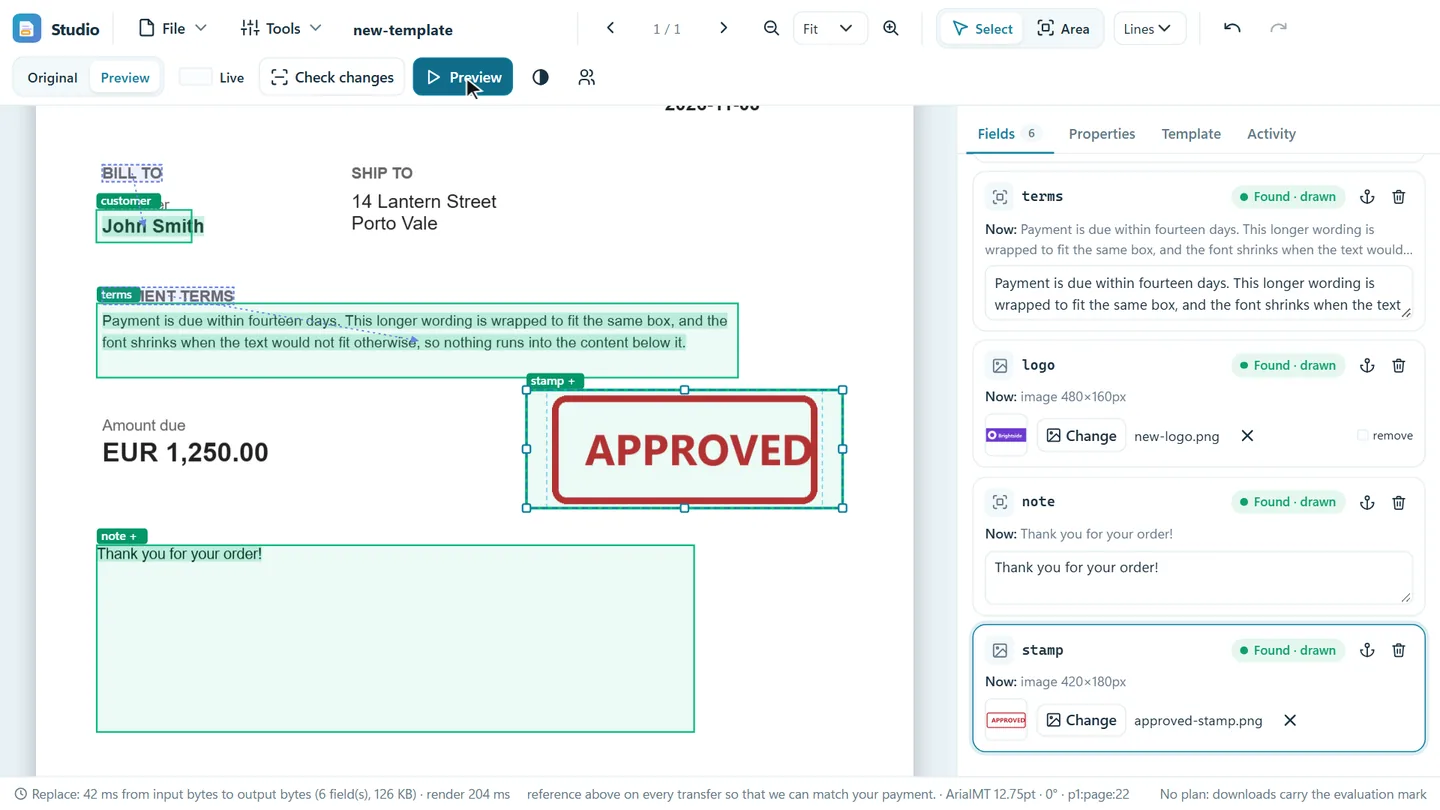
- Preview (Ctrl Enter) replaces the values and shows the result. Old content is really removed, not covered up.
- Original / Preview switches between the two.
- Live updates the preview as you type.
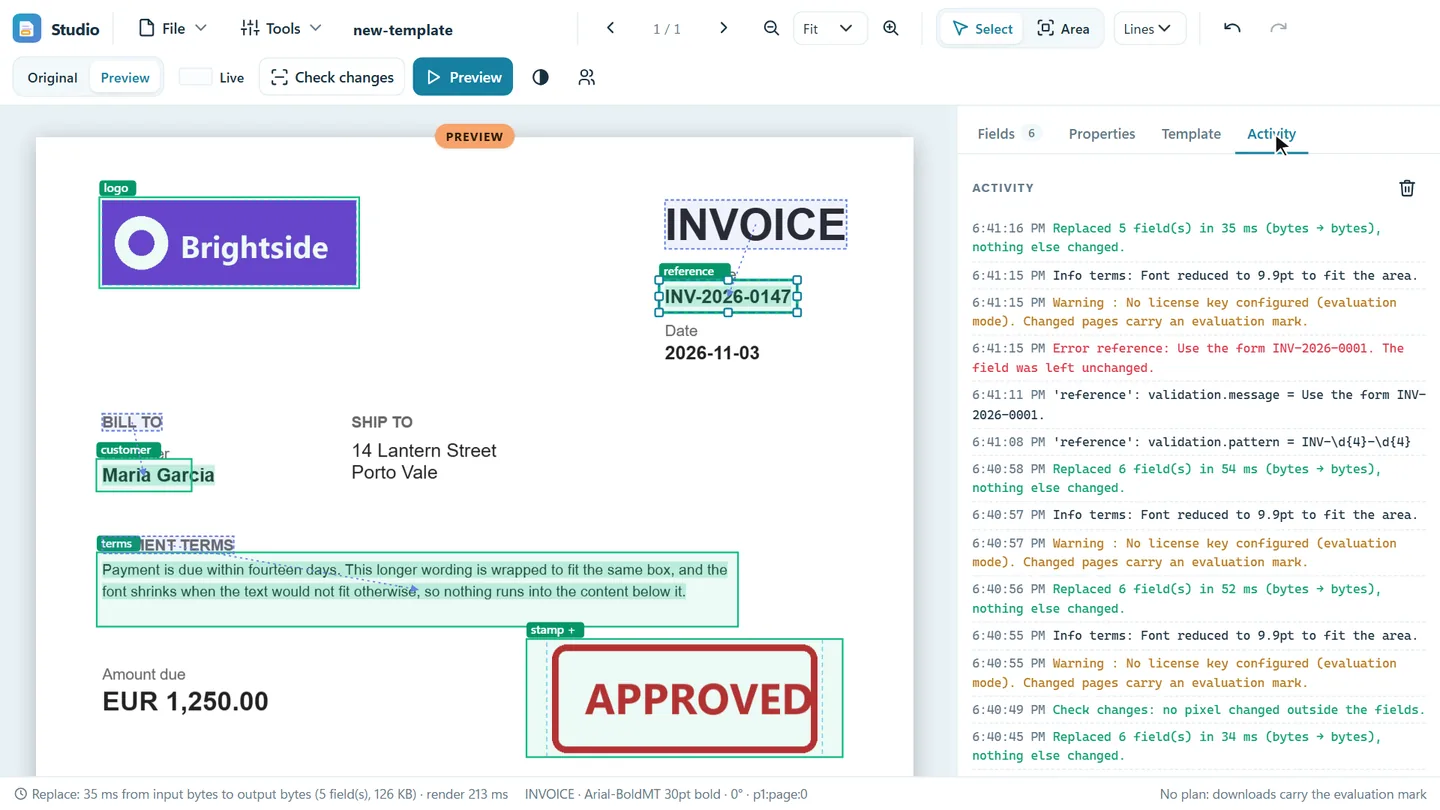
- Check changes compares the preview with the original pixel by pixel. Changes outside your fields are marked in red.
The status bar shows how long each step took. The Activity tab logs every action and message, such as a font being reduced to fit.
8. Style new content
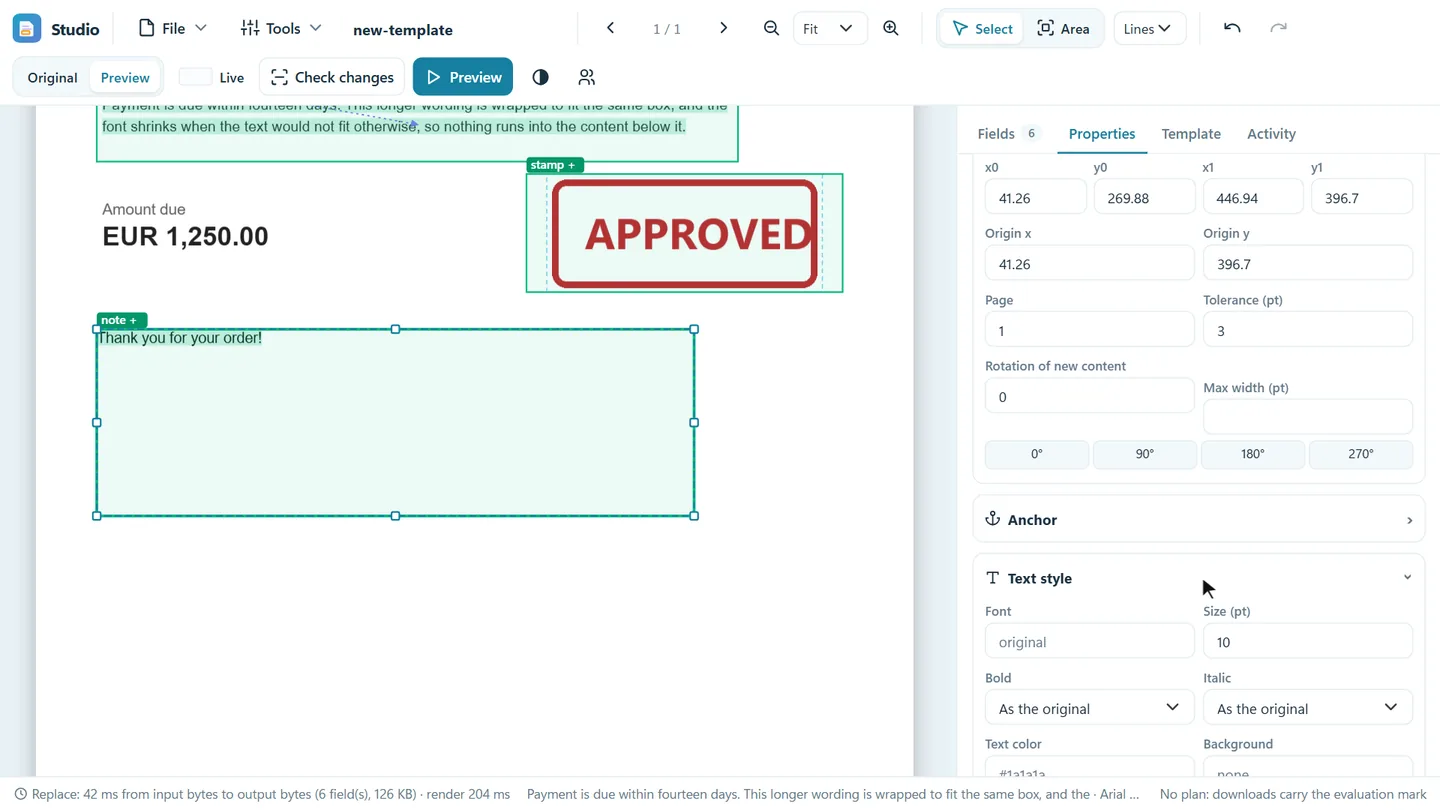
Select a field and open the Properties tab. Under Text style you can set the font, size, bold, italic, text color, background, letter spacing, alignment, line height and minimum font size. The background fills the box first, for example white to cover printed content. Insert at the expected place when the text is missing writes the value even when a document has none there.
If a font lacks some characters of a value, an installed font that has them is used and the Activity tab says which.
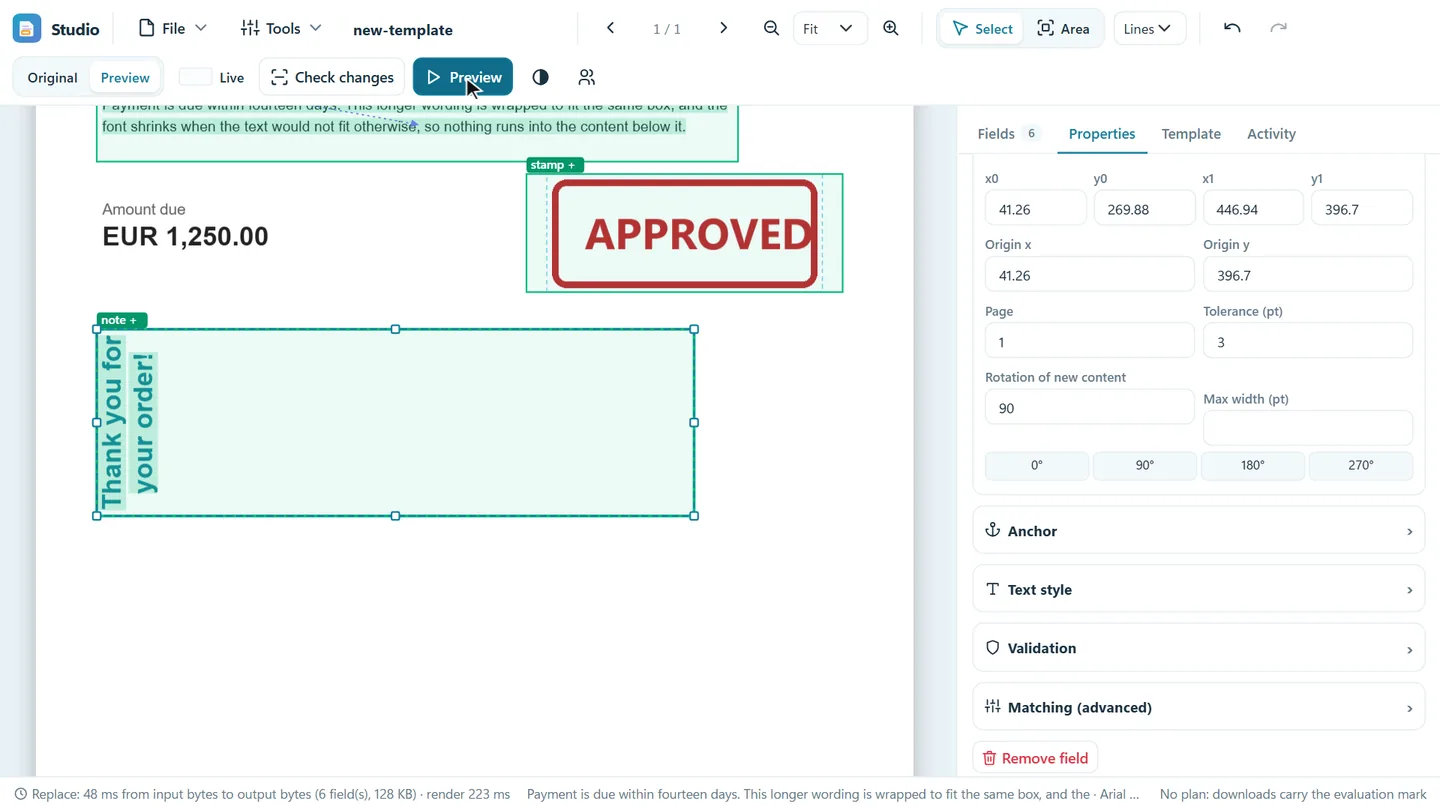
9. Rotation
New content keeps the direction of what it replaces. To change that, go to Properties → Position and press 0°, 90°, 180° or 270°, or type any angle in Rotation of new content. Original goes back to the direction of the replaced content. This works for text, images and placeholders.
10. Validation
Under Properties → Validation a field can be required, have a maximum length, or have a pattern (a regular expression), with your own message. A new value that breaks a rule is refused and the field stays unchanged. Values read from documents that break a rule give a warning.
11. Editing and undo
Drag the dashed box of the selected field on the page to move it, or a corner to resize it. Position under Properties holds the exact coordinates, the page and the tolerance. Matching (advanced) holds what the field is matched on. Del removes the selected field.
Ctrl Z and Ctrl Y undo and redo template changes. All shortcuts are under Tools → Keyboard shortcuts.
12. Fingerprint and template check
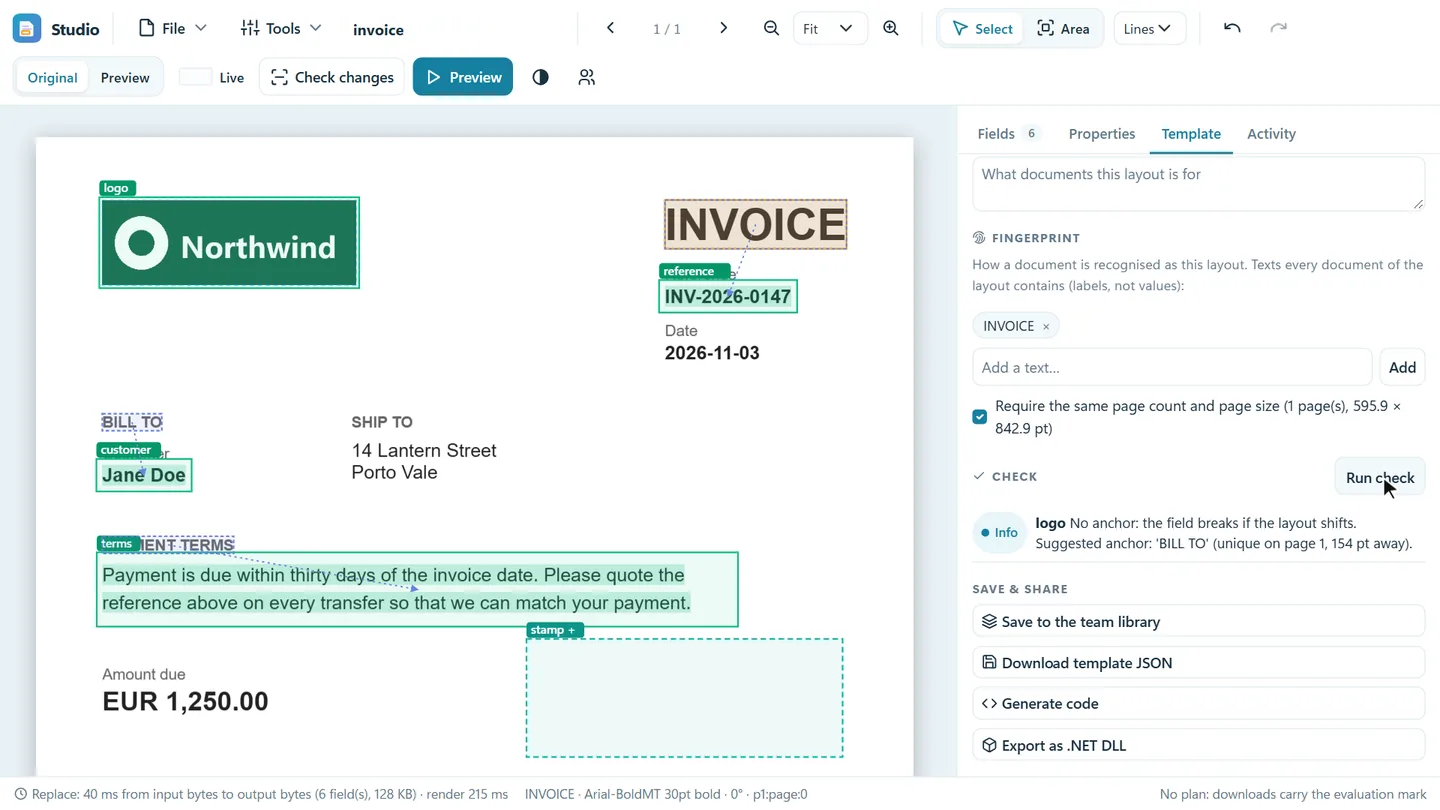
The fingerprint is how a document is recognised as this layout, which is what lets Glyphplace pick the right template from several. Click a text that every such document contains, a label and not a value, and choose Add this text to the fingerprint. On the Template tab you can name the template, add texts by hand, and require the same page count and size.
Run check reports weak spots on the open document: fields without anchors (with a suggestion), ambiguous or missing fields, and an empty fingerprint.
13. Test on many documents
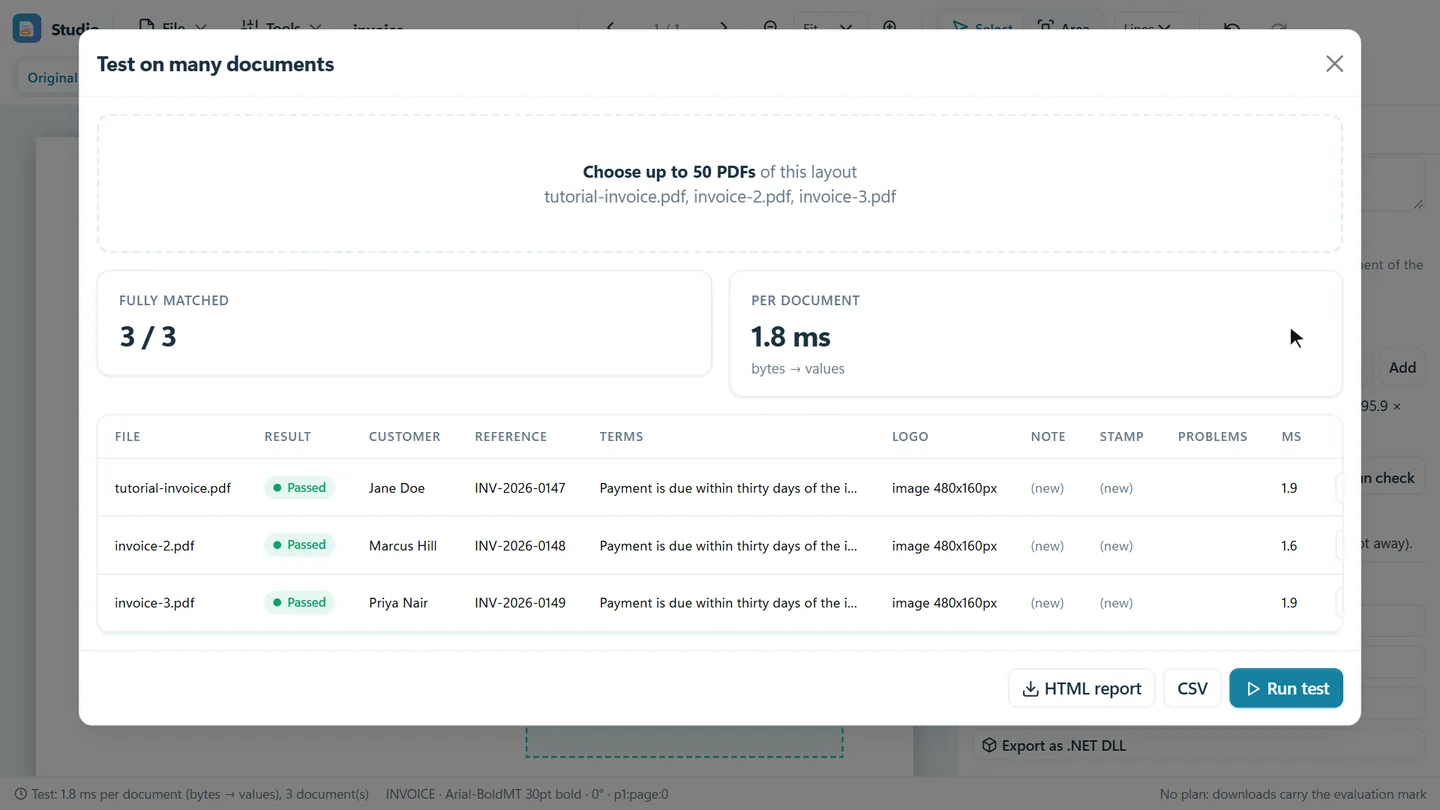
Tools → Test on many documents runs the template on up to 50 PDFs of the layout and shows, per file, whether it matched, the value of every field, and any problems. A multi-line area always finds whatever text is inside it, so the test also fails a document when the text in an area has moved compared with your sample; add an anchor to fix that. Download the results as an HTML or CSV report.
14. Batch fill from CSV or JSON
Tools → Batch fill makes one filled copy of the open document per row. Columns are field keys, and the optional _name column names each file. Image columns name files you upload with the data, or hold data: URIs. Choose a ZIP with one PDF per row, or one merged PDF. Download a sample CSV gives you the columns of your template.
_name,customer,reference
anna,Anna Kovacs,INV-2026-0201
bruno,Bruno Silva,INV-2026-0202
Without a plan, batches are limited to 10 rows and carry the evaluation mark.
15. Generate code or a DLL
Tools → Generate code writes a C# class with one property per field, or a TypeScript or Python client for the REST API. Each file starts with a ready-to-copy example for its own fields.
byte[] output = TemplatePdf.Update(service, input, document =>
{
    document.Customer = "John Smith";
    document.Logo = File.ReadAllBytes("new-logo.png");
});
Tools → Export as .NET DLL builds a ZIP with the DLL, XML docs and symbols, for .NET 8 or later. The template is built in, and one method takes every field as an optional parameter:
byte[] output = TemplatePdf.Fill(pdf, customer: "John Smith", logo: File.ReadAllBytes("new-logo.png"));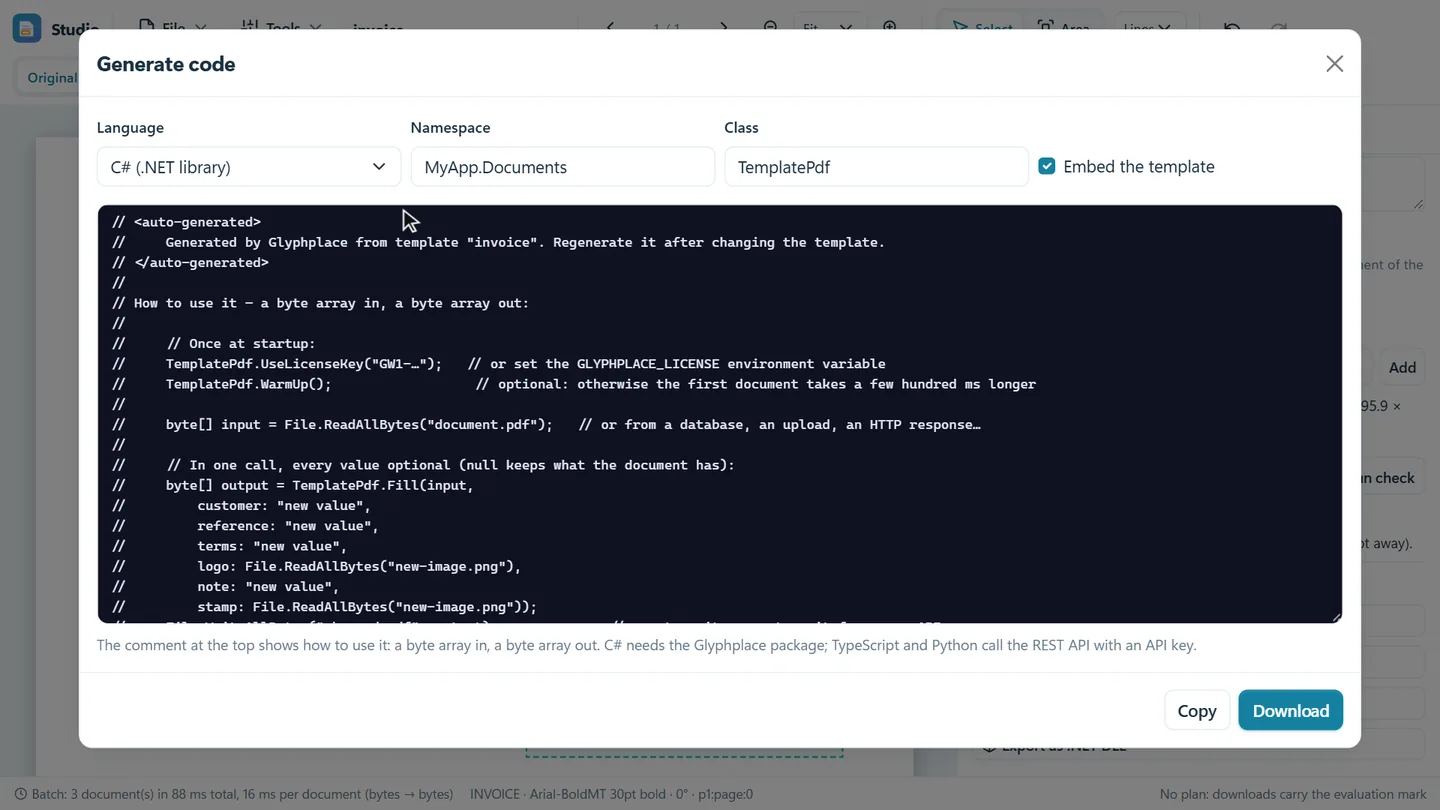
16. Save and share
The File menu saves the template as JSON (Ctrl S) and opens it again, and opens from or saves to the library you share with your team. Download filled PDF writes the final document and counts as one document of your plan; Download preview always carries the evaluation mark.
17. Use templates from your application
.NET library: details are in the quick start.
dotnet add package Glyphplace.Corevar service = new PdfFieldService(new PdfFieldOptions { LicenseKey = key });
var template = PdfTemplate.Load("invoice.json");
ExtractResult read = service.Extract(pdf, template); // read.Values["customer"]
ReplaceResult result = service.Replace(pdf, template, new PdfChanges
{
Texts = { ["customer"] = "John Smith", ["note"] = "Thank you!" }, // text field and text placeholder
Images = { ["logo"] = File.ReadAllBytes("new-logo.png"), // replaces the image
["stamp"] = File.ReadAllBytes("approved.png") }, // image placeholder
});
File.WriteAllBytes("out.pdf", result.Pdf);Command line:
Glyphplace.Cli extract invoice.pdf invoice.json
Glyphplace.Cli replace invoice.pdf invoice.json out.pdf customer="John Smith"
Glyphplace.Cli batch invoice.pdf invoice.json customers.csv out.pdf --merge
Glyphplace.Cli test invoice.json folder report.html
REST API: create a key under API keys. All keys of an account share its template library and quota.
curl -H "Authorization: Bearer gw_…" -F file=@invoice.pdf -F template=invoice https://your-site/api/v1/extract

curl -H "Authorization: Bearer gw_…" -F file=@invoice.pdf -F template=invoice \
     -F 'changes={"texts":{"customer":"John Smith"},"images":{}}' https://your-site/api/v1/replace
The replace response holds the PDF as base64. Without a template, extract and replace detect the layout among your library's templates.
18. The Windows Browser
The Glyphplace Browser is a desktop tool with the same features as the Studio. Click text or images to define fields; use Draw area with Existing text, New text placeholder or New image placeholder. Drawn areas snap to the nearest text corners; hold Alt to place them freely. Tools has the template check, folder test and batch fill, and Template → Library connects to your team's library.
Good to know
- Safe to run again: everything Glyphplace draws is marked in the PDF with its field and value. A replaced document can be read with the same template and replaced again; the earlier drawing is removed, not painted over.
- Verification: after every replacement the output is compared with the input, and changes outside the fields are reported.
- Barcodes printed in a document are not read or generated. If a value also appears in a barcode, the two will no longer agree after you change the value. A barcode that is an image can be swapped for a ready-made picture with an image field.